

03 August 2026 11 min read
Timber look tiles outdoor: the complete guide for Australian alfresco areas
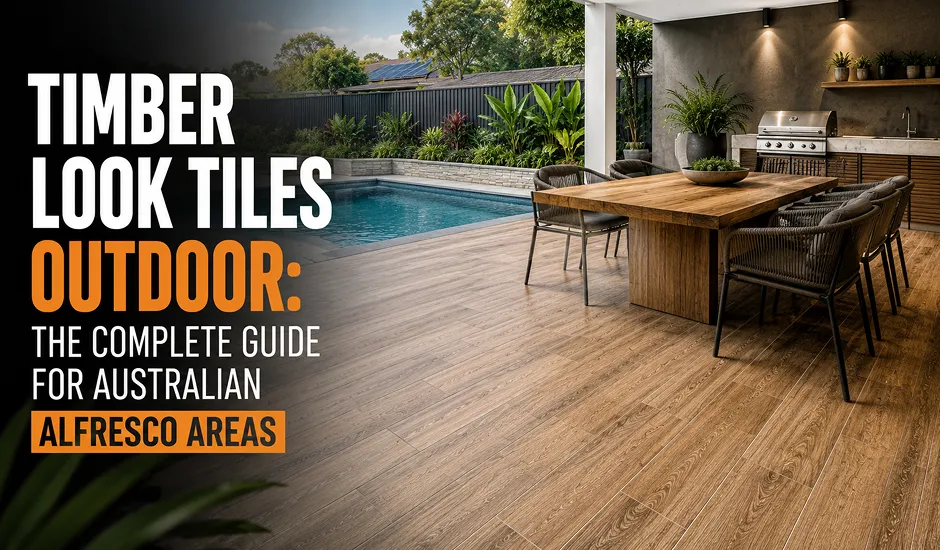
Every Australian alfresco area works double shifts. It takes direct summer sun, sudden afternoon storms, bare feet dripping from the pool, and barbecue traffic carrying plates and stubby holders, sometimes all within the same hour. Timber look tiles outdoor rated for these conditions give you the warmth of a timber deck without the splitting, greying, and rot that real timber develops after a few seasons of Australian weather.
This guide covers what to look for in outdoor timber look tiles, which sizes suit which alfresco spaces, how they compare to real timber decking specifically in outdoor conditions, and what your tiler needs to know before installation. For indoor room-by-room comparisons, see the separate timber look tiles vs real timber flooring guide.
Why real timber decking struggles in Australian conditions
Timber decking looks great in the first year. By year three in most parts of Australia, the story changes.
Constant UV exposure dries out the timber and turns it grey, no matter how diligently it gets oiled. Most homeowners oil their deck once a year; timber in full Queensland or WA sun needs it every four to six months to hold any colour. Once the surface dries past a certain point, it splinters, and splintered decking under bare feet near a pool is a safety problem, not just a cosmetic one.
Water creates the other half of the issue. Any spot where water pools, near a downpipe, along a low edge, beside a planter box, becomes a starting point for rot. Merbau and spotted gum resist it better than cheaper options, but no timber is immune if drainage is poor.
Then there is the substructure. The bearers and joists underneath a timber deck are the primary termite entry point for many Australian homes, particularly in northern NSW, Queensland, and the Top End. A concrete slab with tile on top removes that risk entirely.
The maintenance cycle alone costs real money over time: oiling, sanding back, replacing split boards, tightening popped screws, inspecting for termite damage. Over a 10-year period, maintenance on a timber deck can approach the original installation cost.
How timber decking and timber look tile hold up in an alfresco setting
The comparison here is narrow on purpose: this is only about what happens outdoors, under direct weather, where both materials face conditions no indoor floor ever sees.
|
Outdoor performance factor |
Timber look tile (alfresco rated) |
Real timber decking |
|
UV exposure over summer |
Kiln-fired glaze cannot fade; colour is identical at year 10 |
Greys within one season without oiling; needs re-staining every 4 to 6 months in full sun |
|
Rain pooling near downpipes or low edges |
Water sits on the surface and evaporates or drains; no absorption damage |
Pooled water starts rot at low points within 2 to 3 wet seasons |
|
Barefoot safety when wet |
R10/R11 textured finishes channel water and grip improves wet |
Develops algae film in shaded damp spots; gets slippery between cleans |
|
Deck surface temperature at 2pm in January |
Light-toned tile stays walkable barefoot; dark tones retain some heat |
Dark-stained merbau or jarrah becomes painfully hot; too hot for bare feet by midday |
|
Termite risk to substructure |
None; no organic material anywhere in the installation |
Bearers and joists under the deck are the primary termite entry point |
|
Maintenance cycle per year |
Hose down after a barbecue; nothing else |
Oil, sand back, check for split boards, inspect for termite damage, replace popped screws |
|
Expected lifespan before full replacement |
20+ years with zero intervention |
10 to 15 years with consistent maintenance; shorter if maintenance is skipped |
|
Installed cost including substructure |
Tile + screed + adhesive on a concrete slab |
Timber + bearers + joists + fasteners + labour; higher total for a raised deck |
|
10-year running cost |
$0 maintenance spend |
$800 to $2,000+ in oiling products, sanding hire, and board replacements |
What to check before choosing alfresco tiles
1. Slip resistance rating for pool and wet zones
This is non-negotiable for any tile going near a pool, spa, or outdoor shower. Look for tiles with an R10 or R11 slip resistance classification under the Australian Building Codes Board guidelines. A textured or matte finish provides this grip. Glossy finishes, no matter how good they look indoors, are not safe for wet outdoor zones.
Non slip outdoor tiles in a timber look finish give you the appearance of a timber pool deck with grip that actually improves when wet, because the textured surface channels water rather than letting it film over.
2. Water absorption: matching the grade to the exposure
Skip the general theory on absorption grades. For outdoor tile selection, the only question is how exposed the surface is to direct, standing water.
Fully exposed surfaces (uncovered pool decks, open patios with no roof, spa surrounds, outdoor showers): Use porcelain timber look tiles with absorption under 0.5%. These areas sit in rain, cop pool splash continuously, and go through daily wet-dry-heat cycles for six months of the year. Porcelain handles that indefinitely.
Covered or semi-covered surfaces (roofed alfresco, pergola dining areas, verandahs with partial weather protection): Ceramic-grade tile at 6 to 8% absorption handles these conditions without issue. The surface gets occasional wind-blown rain or a spilled drink, but it is not sitting in pooled water. Metro's ceramic planks at 9mm thickness are built for this use case, and they come in at roughly half the cost per square metre of porcelain equivalents.
The transition zone (the two or three metres where a roofed alfresco meets an uncovered pool area): If you want the same timber look to flow from covered to uncovered, use the same Metro collection in both zones but step up to porcelain where the roof ends. The visual match stays consistent; the performance grade changes where the exposure changes.
3. UV colour stability on exposed surfaces
Because the wood grain pattern on timber look tiles is glazed and kiln-fired at temperatures above 1,000°C, it cannot fade from UV exposure. The colour is locked into the glaze permanently. This is the reason outdoor timber look tiles still look the same at year ten that they did on installation day, while the timber deck next door has been re-stained three times.
Matching plank size to the outdoor space
Every size below is recommended for a specific outdoor scenario.
|
Plank size |
Outdoor scenario |
Practical reason |
|
200x1400mm (8"x55") |
Large uncovered pool decks, resort-style entertaining areas over 30 sqm |
Fewest grout joints across a wide open surface; reads as a continuous timber deck from the house looking out |
|
200x1200mm (8"x48") |
Open alfresco areas under a flat-roof pergola, wide patios connecting to bifold doors |
Long enough to reduce grout interruption but easier for a tiler to handle than 1400mm when working to a drainage fall |
|
200x1000mm (8"x40") |
Covered verandahs, roofed barbecue zones, balconies |
Wide plank gives a natural deck look; shorter length suits narrower covered spaces where 1200mm would need more cuts |
|
150x900mm (6"x36") |
Pool surrounds, spa borders, narrow side patios |
Mid-size format is the easiest to work with around pool coping, curved edges, and step-downs where longer planks create awkward cuts |
|
Feature section beside an outdoor kitchen, bar area, or fire pit |
Creates a focal zone rather than covering a full alfresco floor; keep chevron away from the drainage fall line since angled joints complicate water flow |
One rule of thumb for outdoor spaces specifically: the more complex the drainage slope, the shorter the plank you should use. A tiler laying to a two-directional fall around a pool will have a much easier time with 150x900mm than with 200x1400mm.
Pool surround tiles: what changes near water
Pool surrounds are the one zone where every spec matters at once. The tile gets wet constantly, bakes in sun between swims, and sits under bare feet all summer.
For pool surround tiles in a timber look, you need the intersection of three things: an R11 slip resistance rating, porcelain-grade water absorption (under 0.5%), and a lighter tone that stays comfortable underfoot in direct sun. Darker timber finishes absorb more heat and can become genuinely uncomfortable on a 38°C afternoon.
If the pool area connects to a covered alfresco, you can transition from porcelain at the pool edge to ceramic under the roof. Use the same collection in both zones so the look flows, but match each tile grade to the exposure level it actually faces.
Installation notes for outdoor use
Getting outdoor tile installation right is different from indoor work. A few things your tiler needs to plan for:
1. Drainage fall
Drainage fall must be confirmed before any tile goes down. Outdoor surfaces need a minimum fall of 1:100 (1cm per metre) away from the house and toward a drain or garden edge. Standing water shortens the life of any outdoor installation and creates slip hazards.
2. Exterior adhesive
Use a frost and weather-rated product specifically designed for outdoor tile. Standard indoor adhesive will fail through seasonal temperature swings. In frost-prone regions (parts of Victoria, Tasmania, ACT, and the NSW Southern Tablelands), confirm the adhesive rating matches the minimum winter temperatures for your area. Check Standards Australia for applicable tile installation standards.
3. Grout joints
Maintain full joints at 3 to 5mm minimum throughout. Outdoor tile experiences a wider daily temperature swing than any indoor floor. Tight joints that work inside will crack outside. Use a flexible, outdoor-rated grout.
4. Finish zoning
Confirm slip-rated finishes (R10/R11) for pool surrounds and any uncovered wet zone. A covered dining area under a pergola can use a smoother, easier-to-clean finish. Map the finish to the zone before ordering.
About Metro Wooden Tiles
Metro is a specialist manufacturer of wooden-finish ceramic plank tiles based in Morbi, Gujarat, the world's second-largest ceramic tile manufacturing hub. Unlike general tile brands, Metro focuses exclusively on wood-look planks, from 80x450mm chevron to 200x1400mm long-format, all manufactured with 3D high-definition printing for realistic grain patterns and multiple random face designs per tile so the floor never repeats visibly.
Metro exports to 30+ countries with CE and ISO certification, and manufactures exclusively in curve-edge (non-rectified) format for the reasons outlined above. Learn more about Metro's sustainability practices and energy-efficient manufacturing.
Ready to see outdoor-rated timber look tiles in person? Request outdoor-rated samples from Metro and test them in your actual alfresco space before committing.
Frequently asked questions
Are timber look tiles safe to use around a pool?
Yes, as long as you pick a textured or matte finish rated R10 or R11 for wet zones. Pair that with porcelain-grade water absorption (under 0.5%) for constant pool splash exposure. Smooth indoor finishes are not safe near a pool.
How hot do timber look tiles get on an uncovered pool deck in summer?
Light-toned tiles (oak, ash, blonde) stay warm but walkable barefoot on a 38°C afternoon. Dark finishes retain more heat. For uncovered pool decks, avoid charcoal or espresso tones and stick to lighter colours.
What happens to timber look tiles in a week of straight rain?
Nothing. Porcelain-grade tile handles days of pooled rainwater without cracking, staining, or surface damage. Ceramic-grade tile under a covered alfresco handles wind-blown rain fine. After extended wet weather, hose grout lines to clear trapped leaf litter.
What size tile suits a large alfresco entertaining area?
200x1400mm or 200x1200mm planks. Fewer grout lines across a wide outdoor floor, and the surface reads as a continuous timber deck from inside looking out. For pool surrounds with complex drainage, 150x900mm is easier for tilers to work with.
Do outdoor timber look tiles need different installation than indoor?
Yes. You need drainage fall (minimum 1:100), frost-rated exterior adhesive, flexible outdoor grout at 3 to 5mm joint widths, and slip-rated finishes mapped to wet vs dry zones. Indoor methods used outdoors cause cracked grout and lifted tiles within two to three seasons.
What is the difference between rectified and curve-edge tiles for outdoor use?
Rectified tiles have machine-cut tight edges. Curve-edge tiles keep a natural bevel that allows wider grout joints for drainage and thermal expansion, both critical outdoors. They lay flatter through temperature swings and look more like real timber planks. Metro manufactures exclusively curve-edge.
How do timber look tiles compared to composite decking?
Composite resists rot but still fades under UV, scratches from furniture, and retains heat in dark colours. Timber look tiles hold colour permanently, cannot scratch, and need zero maintenance. Tile also costs less per square metre installed and lasts longer (20+ years vs 15 to 20).