

01 July 2026 7 min read
How to Install Metro Diamante Wooden Tiles (203x1010mm)
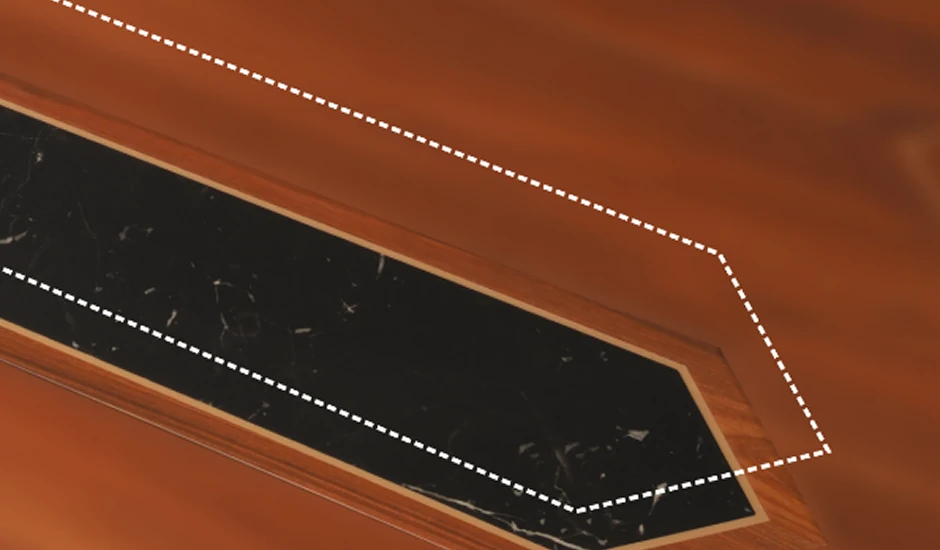
Metro's Diamante Collection is purpose-built for architects, interior designers, and builders who demand more than a standard tile. Its distinctive elongated hexagonal plank shape - 203x1010mm with precision 135° angled ends - breaks the monotony of conventional layouts and introduces movement, visual rhythm, and a premium character to both floors and feature walls. But the same geometry that makes Diamante exceptional also demands careful installation. A misaligned edge, an unplanned layout, or a skipped dry run will compromise the entire pattern. This guide consolidates Metro's official fixing instructions so your site team installs Diamante correctly, every time.
Understanding the Diamante Tile: Key Specs
Before your team begins, brief them on what makes this tile different from a standard plank:
| Specification | Detail |
|---|---|
| Size | 203 × 1010 mm |
| Shape | Elongated hexagonal plank (angled ends at 135°) |
| Edge | Curve edge (non-rectified) |
| Surface | Textured, 7 random patterns per variant |
| Per Box | 6 pcs - 13.24 sq. ft. |
| Box Weight | Approx. 22 kg |
The five Diamante variants (each carries a distinct design identity):
- Diamante-A - Raw wood texture
- Diamante-B - Raw wood texture + Golden engrave punch
- Diamante-C - Raw wood texture + Black marble decor punch + Golden engrave punch
- Diamante-D - Raw wood texture + White marble decor punch + Golden engrave punch
- Diamante-E - Raw wood texture + Black engrave punch
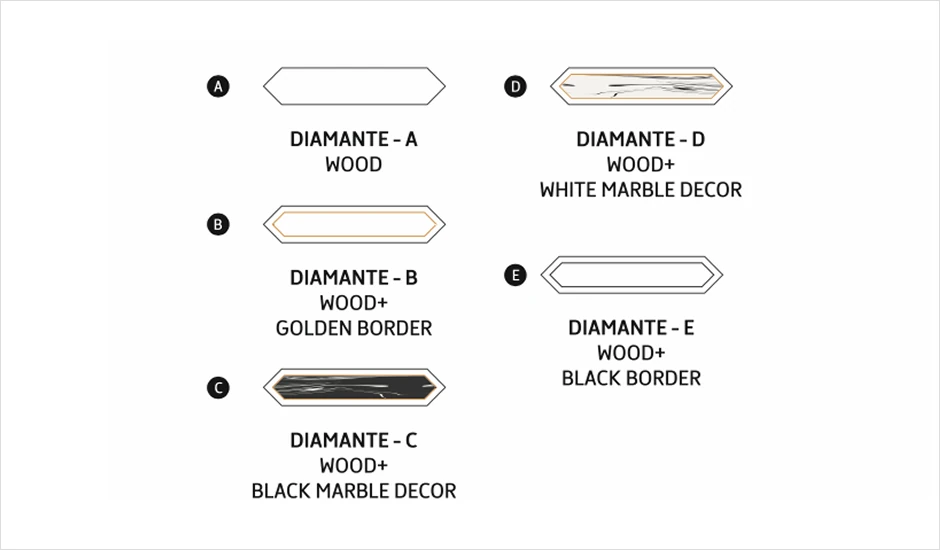
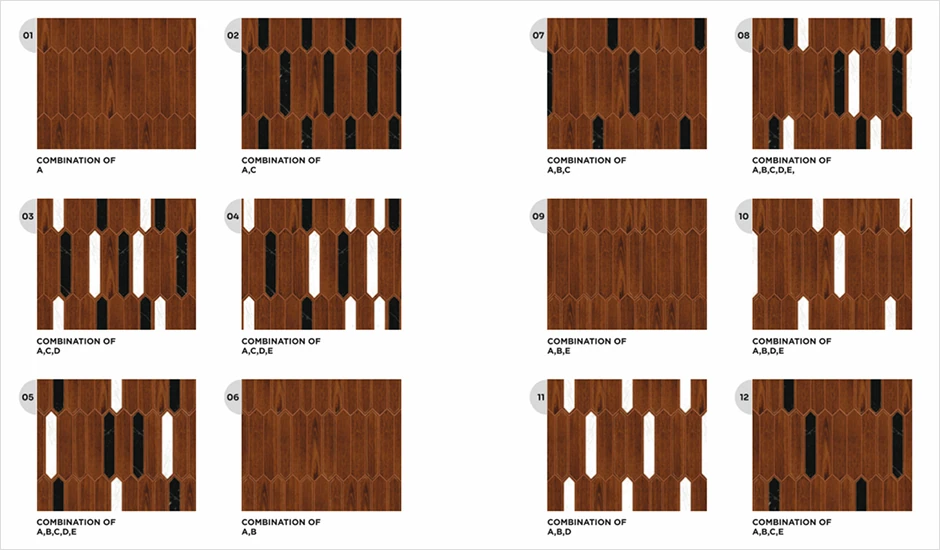
These five variants support 31 different laying pattern combinations - from Combination 01 (Variant A only) to Combination 08 (all five variants together). The combination chosen determines the complexity of the dry layout phase.
The 11-Step Official Installation Process
Step 1 - Pre-Installation Quality Check
All tiles must be checked prior to fixing for:
- Quality - look for chips, surface defects, or damage
- Batch number - all tiles on one project should share the same batch
- Colour and design - confirm the correct variant combination is on site
Step 2 - Surface Preparation
The substrate must be:
- Properly prepared - flat, clean, and free of dust, grease, or loose material
- Allowed to cure for a minimum of two weeks before tiling begins
This is non-negotiable. An insufficiently cured surface is the most common cause of bonding failure in large-format or heavy tiles. At 22 kg per box, Diamante tiles demand a fully stable base.
Step 3 - Mix Tiles from Multiple Boxes
When picking tiles for installation, draw from various boxes alternately - not one box at a time. This ensures an acceptable blend of colour and design across the surface. Shade variation is inherent in the manufacturing of ceramic tiles. Mixing boxes is the standard method to distribute variation naturally and avoid visible block patterns.
Step 4 - Layout Marking and Dry Laying (Critical for Diamante)
This is the step most commonly skipped - and the most important for Diamante. Because each tile has angled ends at 135°, layout marking must be done before any adhesive is applied to maintain the correct Diamante pattern and alignment. Process:
- Mark the reference centerline of the room or wall using a chalk line.
- Decide your laying pattern combination (from the 31 available options in the Diamante catalogue).
- Dry lay (place without adhesive) a representative section of the floor.
- Confirm the pattern flows correctly, angles meet cleanly, and the layout suits the room geometry.
- Mark the final layout lines before proceeding.
Dry laying of tiles is recommended before final fixing.
Step 5 - Choose the Right Adhesive
For fixing Diamante tiles, use the recommended fixing adhesive or equivalent product for best results.
- For floor application using the traditional mortar method: cement and sand in a 1:4 ratio is not specified for Diamante - use tile adhesive as recommended.
- For wall (dado) application adhesive or equivalent material is the correct choice.
Do not substitute with inferior bonding materials. The angled geometry of Diamante tiles places lateral stress on joint edges that requires a reliable, full-bed bond.
Step 6 - Apply Adhesive (Both Surface and Back of Tile)
Apply adhesive evenly on the surface using a notched trowel. Additionally, apply adhesive on the back of each tile before placing. This double application - surface and back-buttering - ensures:
- Full bedding coverage
- Proper bonding across the entire tile face
- No hollow spots beneath the angular edges of the tile
Step 7 - Place and Press Tiles Correctly
- Press tiles gently by hand for even placement.
- Do not use iron, hammers, or any heavy materials to press tiles. This is explicitly prohibited in Metro's installation instructions.
- While fixing, ensure all edges and angular sides are aligned properly and joints are maintained uniformly to achieve the required design continuity.
The 135° angled ends of each Diamante tile must align exactly with the adjacent tile. Even a small angular deviation compounds across multiple tiles and disrupts the overall pattern.
Step 8 - Maintain Uniform Joint Gaps
Keep a joint gap of 1 to 2 mm between all tiles throughout the installation. This gap serves two functions:
- Thermal expansion - allows tiles to expand and contract without cracking or lifting
- Pattern definition - uniform joints preserve the visual clarity of the Diamante geometric layout
Use tile spacers to maintain consistency. Remove spacers before the adhesive sets.
Step 9 - Bed Curing Period
After all tiles are laid, allow the bed to cure for 3 to 4 days before proceeding to grouting. Do not allow foot traffic or load on the surface during this period. Premature pressure can shift tiles - a critical concern with Diamante's angled edges, which need full adhesion to maintain their angular alignment.
Step 10 - Fill Joints with Grout
Once the bed is fully cured, fill all joints with grout.
- Apply grout evenly across all joints.
- Clean excess grout from the tile surface promptly with a damp sponge before it sets.
- Select grout colour thoughtfully: a contrasting grout emphasises the hexagonal geometry, while a tone-matched grout creates a seamless wood-plank flow.
Step 11 - Liability and Compliance
Metro's official installation instructions carry a clear advisory: The company will not accept any liability in case of any problems arising out of non-adherence to the above fixing instructions. For architects and builders, this means the installation checklist above is not optional guidance - it is the standard against which any warranty or liability claim will be assessed.
Quick Reference: Diamante Installation Checklist
For site supervisors and project managers, use this checklist before and during installation: Before Installation
- Tiles checked for quality, batch number, and colour match
- Substrate cured for minimum two weeks
- Laying pattern combination confirmed
- Layout marked and dry lay completed
- Correct adhesive on site
During Installation
- Tiles drawn from multiple boxes alternately
- Adhesive applied to both surface and back of tile
- Angular edges aligned uniformly on every tile
- Joint gaps maintained at 1–2 mm with spacers
- No iron tools or hammers used for pressing
After Installation
- Bed curing for 3–4 days before grouting
- Joints filled evenly with grout
- Tile surface cleaned of excess grout
Design Possibilities: The 31 Laying Patterns
One of Diamante's defining advantages for design professionals is its 31 laying pattern combinations. These range from:
- Single-variant compositions (e.g., Combination 01 - Variant A only) for a clean, uniform wood-tone floor
- Dual-variant combinations (e.g., Combination 06 - A+B) introducing golden border accents
- Multi-variant compositions (e.g., Combination 08 - A+B+C+D+E) for bold, layered expressions combining wood, marble, and metallic detail
This versatility is why architects highly rate the Diamante series - it enables a stronger visual identity and more creative expression than any standard rectangular plank tile.
Explore the Full Diamante Collection
The Diamante 203x1010mm series is available in six colourways - Diamante Wood 1101 through 1106 - each with 7 random surface patterns per tile for authentic, non-repetitive visual flow. Browse all variants, download the catalogue, or request a sample kit: metrowoodentiles.com/diamante/203x1010mm T: +91 99744 43264 E: info@metrowoodentiles.com Address: 8-A National Highway, Lakhadhirpur Road, Morbi – 363642, Gujarat, India Metro Wooden Tiles - India's No. 1 Curve Edge Wooden Plank Tile Brand.