

07 July 2026 8 min read
Metro Chevron Wooden Tiles Installation Guide for Professionals
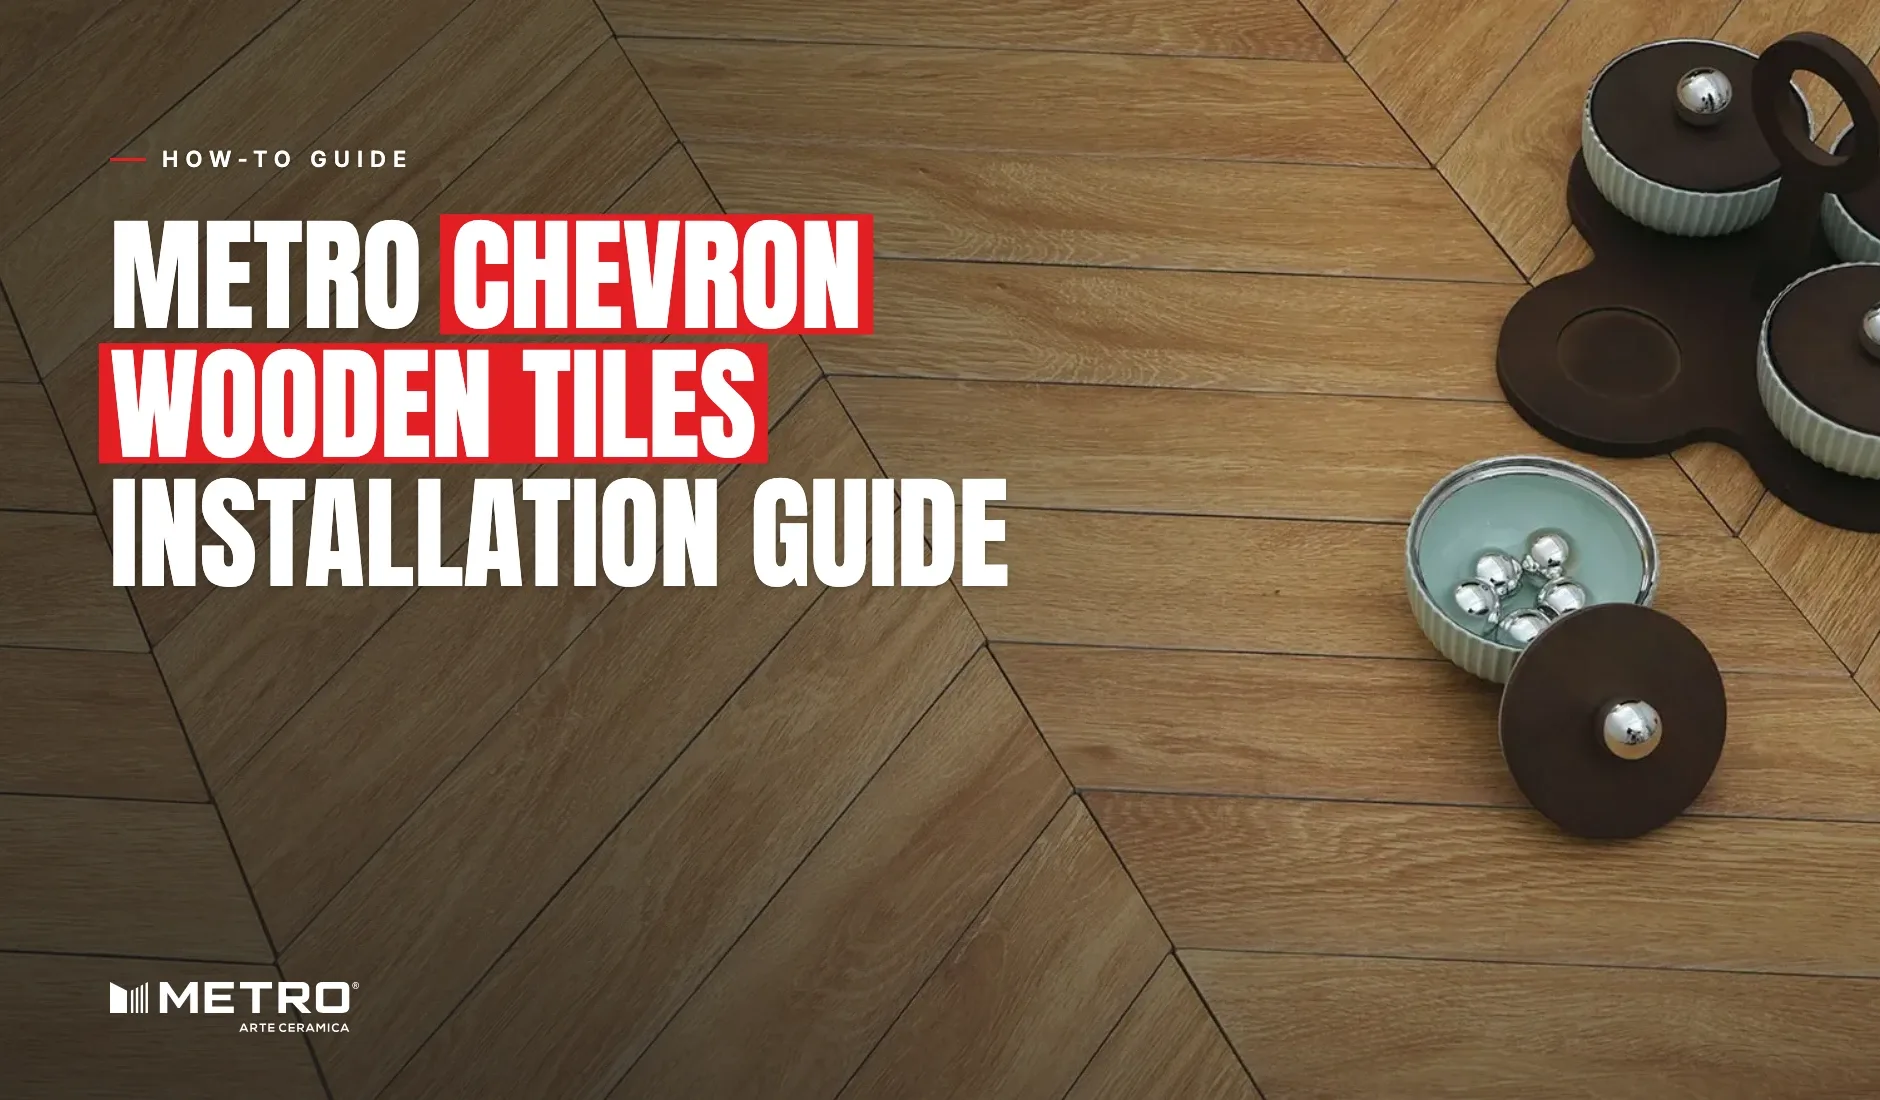
There's something deeply satisfying about a chevron floor done right. That sharp, continuous V-shape moving across a room. It draws the eye, creates energy, and makes a space feel designed rather than just finished. But here's what most people don't say out loud: chevron is one of the most unforgiving patterns to install. One degree off at the centre and the whole floor tells the story. Metro's Chevron wooden tiles come in two sizes, 150x900mm and 80x450mm, and both demand the same thing from your site team: patience, precision, and a proper understanding of how the pattern actually works. This guide will walk you through exactly that.
What makes Metro Chevron wooden tiles different
Most tile patterns are forgiving. Chevron is not. Unlike herringbone, where rectangular tiles are placed at right angles to each other, chevron tiles have precisely angled ends that must meet exactly at the joint. When they do, the result is a clean, arrow-like V-shape that flows continuously across the surface. When they don't, there's a gap or a step at every peak, and no amount of grouting will hide it. This is why the two things that matter most in chevron installation are: choosing the right size for the space, and starting the layout correctly.
Which size is right for your space?
Metro offers two Chevron formats. They're not interchangeable; each creates a very different reading of the same pattern.
150x900mm: bold and architectural
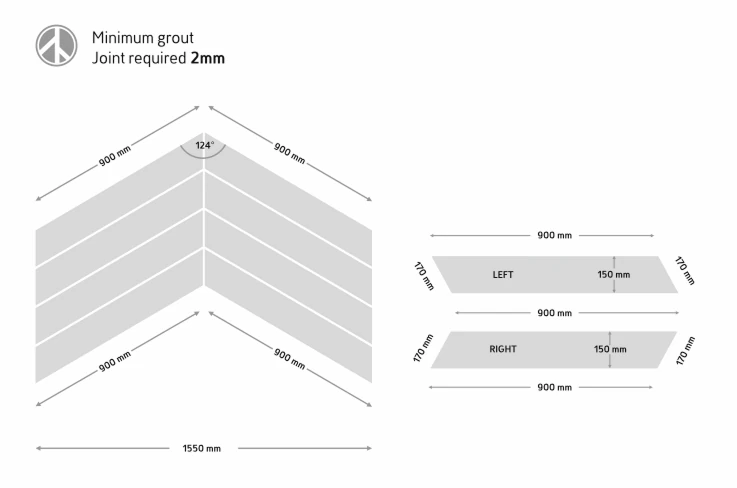
Each tile is 900mm long and 150mm wide. When a LEFT and RIGHT pair is laid together, the effective width of the V covers 1550mm with a peak angle of 124°. This is the format for large floors, open-plan living spaces, and statement feature walls. The elongated plank proportion makes the chevron feel structured and expansive, the kind of floor that holds its own in a high-ceiling space or a wide-format room.
80x450mm: fine and detailed
Each tile is 450mm long and 80mm wide. A LEFT and RIGHT pair covers an effective width of 1150mm with a peak angle of 121°. This format reads more intricately. It adds texture and movement to smaller rooms, accent walls, and hospitality interiors where you want the eye to slow down and appreciate the detail. The tighter scale makes the pattern feel more layered, almost handcrafted.
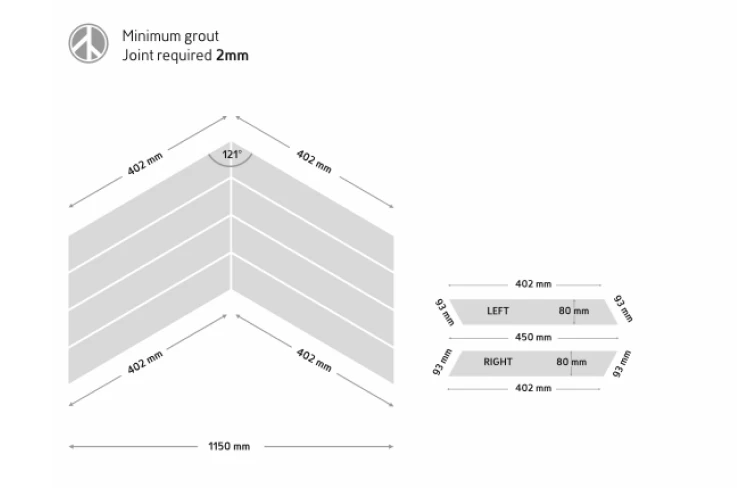
Both sizes require a minimum 2mm grout joint. No exceptions.
The Laying Patterns: More Possibilities Than You Think
Chevron isn't a single look. Depending on how the tiles are combined and oriented, Metro's Chevron series supports 10 distinct laying patterns, from clean, classic V-shapes to more complex, multi-directional compositions.
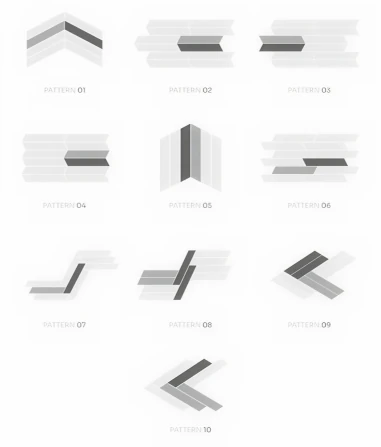
Pattern 01 is the pure classic, a single continuous chevron V running the length of the floor. Pattern 05 introduces a mirror effect, creating a bold central axis. Patterns 07 through 10 push into more experimental territory, layering direction changes for a dynamic, almost sculptural surface. For most residential and hospitality projects, Patterns 01 to 04 are the professional's choice: they're clean, they stay in style, and they let the wood texture do the work. For retail interiors and statement lobbies, Patterns 07 to 10 create visual energy that stops people in their tracks.
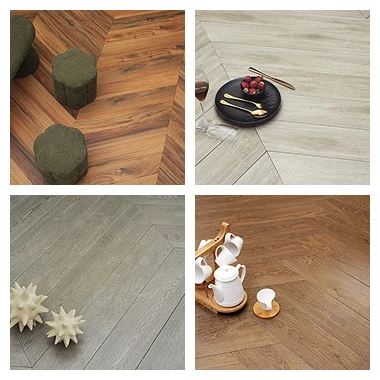
The pattern you choose should be confirmed and dry laid before any adhesive goes down. Changing your mind after fixing is expensive.
Before installing Metro Chevron wooden Tiles
Check every tile before anything goes down.
Go through quality, batch number, and shade. Shade variation is natural in manufactured tiles. It's not a defect, it's the material. But variation from different batches can look jarring on a finished floor. Confirm everything is from the same batch before your team starts laying.
Give the surface its time.
The plastered substrate needs to be fully ready and cured for a minimum of two weeks before tiling begins. Rushing this is the most common reason bond failures happen months after installation, not during.
Pull from multiple boxes throughout the job.
Don't empty one box before opening the next. Mix tiles from different boxes as you go. This naturally distributes any shade variation across the floor so it reads as character rather than inconsistency.
How to install Metro Chevron Wooden Tiles
1. Start from the centre
This is the rule chevron breaks that most installers forget. You do not start from a wall or a corner. You find the centre point of the room, the exact spot where the V-shape will peak, and you begin there. Starting from the centre gives you a symmetrical, balanced layout that reads correctly from any direction you enter the room. Mark this point clearly. Draw your chalk lines out from it. Then dry lay (place tiles without adhesive) across a representative section of the floor before committing to anything permanent. Adjust here, not after the adhesive is down.
2. Fix LEFT and RIGHT tiles alternately
Every chevron tile is either a LEFT or a RIGHT. The angled end of a LEFT tile only meets cleanly with the angled end of a RIGHT tile. This is what creates the V. Alternate them consistently. Their angled ends must meet exactly at every joint: not approximately, exactly. Even a small gap or misalignment at the peak compounds visually across dozens of tiles.
3. Apply adhesive the right way
For floor installation, you have two options: The traditional mortar method: mix cement and sand in a 1:4 ratio with water to a uniform consistency. Spread a bedding layer of 20 to 25mm thickness, working one square metre at a time. Then apply a thin layer of slurry directly to the back of each tile before placing it. Or use the recommended tile fixing adhesive: apply evenly to the surface and to the back of the tile before placing. Either way, the principle is the same: full bedding coverage, no hollow spots, proper bond across the entire tile face. For wall (dado) installation, use tile adhesive or equivalent. Mortar is not the right method for walls. Press each tile gently and evenly by hand. Never use iron tools, hammers, or heavy objects to press tiles down. This is explicitly stated in Metro's installation instructions, and for good reason. The surface texture and glaze of wooden plank tiles are not designed to absorb impact.
4. Keep the 2mm joint, everywhere, every time
A minimum 2mm grout joint must be maintained between all tiles throughout the installation. This isn't just about aesthetics. The joint accommodates thermal expansion: tiles expand and contract with temperature, and without the gap, they push against each other. On a chevron floor specifically, inconsistent joints also break the visual rhythm of the V-shape. Use tile spacers. Use level guides. Keep it consistent from the first tile to the last. Extend the pattern outward from the centre in both directions simultaneously, checking alignment with a level as you go.
5. Let it cure before you grout
Once all tiles are laid, step away. Allow the bed to cure for 3 to 4 days before grouting. No foot traffic, no load, nothing on the surface during this time. The angled ends of chevron tiles are particularly vulnerable to micro-shifts during the curing period; any movement before the bond sets will be visible in the finished joint. After curing, fill all joints evenly with grout and clean the tile surface promptly with a damp sponge before the grout sets.
One Last Thing on Grout Colour
It's a small decision that changes the entire reading of the floor. On the 150x900mm format, a contrasting grout sharpens the V-lines and makes the geometric structure bolder. In the 80x450mm format, a tone-matched grout lets the intricate texture breathe without competing with it. Neither is wrong, but it's worth deciding before grouting day, not during it.
The 4 Standard Laying Patterns for Plank Tiles
For straight plank tile formats used alongside chevron in the same project, Metro recommends these four standard laying patterns, all requiring a minimum 2mm grout joint:
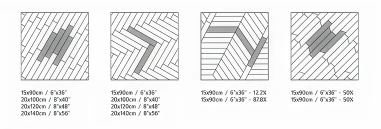
- Straight Lay: clean horizontal rows, available in 15x90cm, 20x100cm, 20x120cm, 20x140cm
- Chevron: V-shaped diagonal, same size range
- 12.2% / 87.8% Offset: A staggered offset that maintains visual balance and prevents lippage
- 50% Offset: A classic half-tile stagger, same size range
When mixing chevron tiles with straight plank tiles in a single project (for example, chevron in the living area and straight lay in the corridors), keeping the grout joint consistent across both areas ties the floor together visually.
See the Metro Chevron Collection
metrowoodentiles.com/chevron/150x900mm metrowoodentiles.com/chevron/80x450mm
T : +91 99744 43264 E : info@metrowoodentiles.com Address : 8-A National Highway, Lakhadhirpur Road, Morbi 363642, Gujarat, India
Metro Wooden Tiles: India's No. 1 Curve Edge Wooden Plank Tile Brand. ISO & CE Certified.